Everyone who has ever made a comic can tell you the process is never consistent or the same between creators. So I thought I’d take some time to give a better picture of how I completed my recent graphic novel in 1 year.
I actually talked about my comic making process in an earlier Newsletter (Letters from Theresa – Sept 2025) which was sent shortly after finishing my first pass on the pages. Now that the graphic novel is complete, printed and distributed to its Kickstarter backers, I feel like I can speak on the topic of process a little more thoroughly.
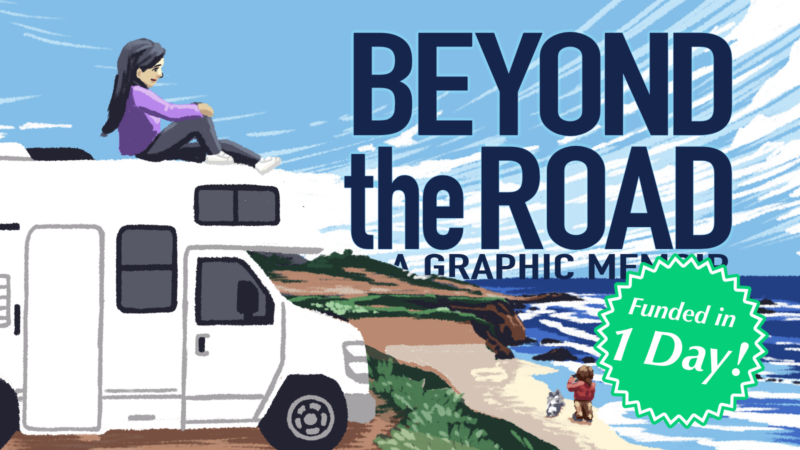
But first! What is Beyond the Road?
Beyond the Road is my first full-color graphic novel memoir — a 110-page, true story comic about rediscovering adventure with chronic illness, told through a 4-day RV trip down the Big Sur coast. It’s 1st print run was successfully funded through Kickstarter and it is now being sold at various book and comic events. More information about the book can be found on its official page: TheresaArzola.com/beyondtheroad
The Comic Creation Process
Step 1: Writing a Script
Beyond the Road, as a story-based project, started with a script. Not every comic story starts with one, but I found writing at least an outline down helped organize the thoughts into a readable thread.
While there are common scripting practices in comics (especially if you work in teams on major IPs like Marvel’s or DC’s), there’s actually no standard format when it comes to comic scripts. It’s really just a “what works best for you” situation. As long as you can understand your notes and are getting what you need from this step, then anything goes.
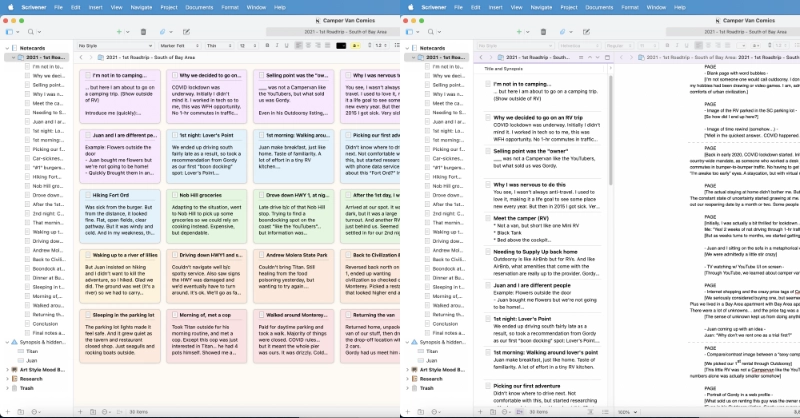
For me, my script started out as virtual index cards in an application called Scrivener. The card format allowed me to create a visual outline while rearranging key beats I wanted to hit in order to create a coherent story.
From these cards I then wrote a pseudo-script. I say “pseudo” because it acted more like a plot summary than a panel-by-panel comic script you might see from others. I just needed to make sure I had a complete and coherent story before I started putting pencil to paper.
The real pacing and scene plotting happened in the next phase: thumbnails.
Step 2: Sketching Thumbnails
Every comic creator has a different process for these. Some scribble in the margins of their scripts. Some go straight to rough sketching in software like Clip Studio to figure out their layouts. It’s all about what works for you.
I like drawing multiple tiny images on a single sheet of paper, which for Beyond the Road meant creating a custom 12-page-per-sheet template And roughly drawing each page using the Pencil tool in Procreate.
Seeing multiple pages sketched out at once let me see the story flow between pages and keeping it small meant I wouldn’t focus too hard on drawing details at this stage. Drawing it digitally meant I could select and move panels or pages as necessary as I worked and edited out the story flow.
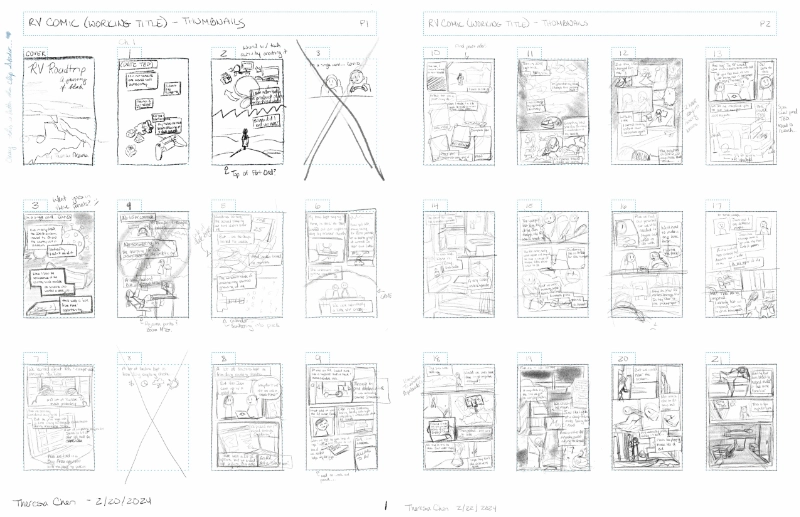
I admittedly have not perfected this part of the process. There were definitely some thumbnails that were drawn so roughly that I have no idea what I wrote or meant to draw later. If I were to do this part again, I would maybe size a LITTLE bit larger. 8 pages per landscape sheet instead of 12 seems more ideal.
However in my case, a combination of my script for plot and dialog and my thumbnails for page and panel layout was enough to allow me to continue.
Step 3: Drawing the Comic Pages
After thumbnails are done, I digitally cut up the sheets and lay them out in a Clip Studio comic project (something you can do in Clip Studio Pro only…) and use them as a rough “base sketch”. Then it’s just a matter of drawing, paneling, adding text, and painting each page until it’s done!
Drawing (or “rendering”) the comic pages is definitely the longest of the steps and often gets broken down into different passes (sketching, inking, coloring, lettering for example). However just like with the script and thumbnails, everyone has their own process based on what works best for them.
For the most part, I started each page with panel borders and text. Because my thumbnails were so scribbly, having crisp text on each page helped me read the context of the thumbnail sketches better as I go. After that it was sort of a… painting with vibes situation.
I didn’t sketch first. I used the scaled-up thumbnails as my really rough sketch. I also didn’t ink line because the art style didn’t call for it. Like with acrylic Posca markers, it was a lot of laying down areas of color, and then painting new colors overtop to form scenes and shapes. Sometimes I’d use a photo reference (especially for things I wanted to capture more accurately, like park vistas or the details of a Majestic RV), sometimes I painted until it felt “right”.

TBH? The rendering style I chose had a lot to do with how I was able to complete 110 pages in under 1 year.
The chosen rendering style
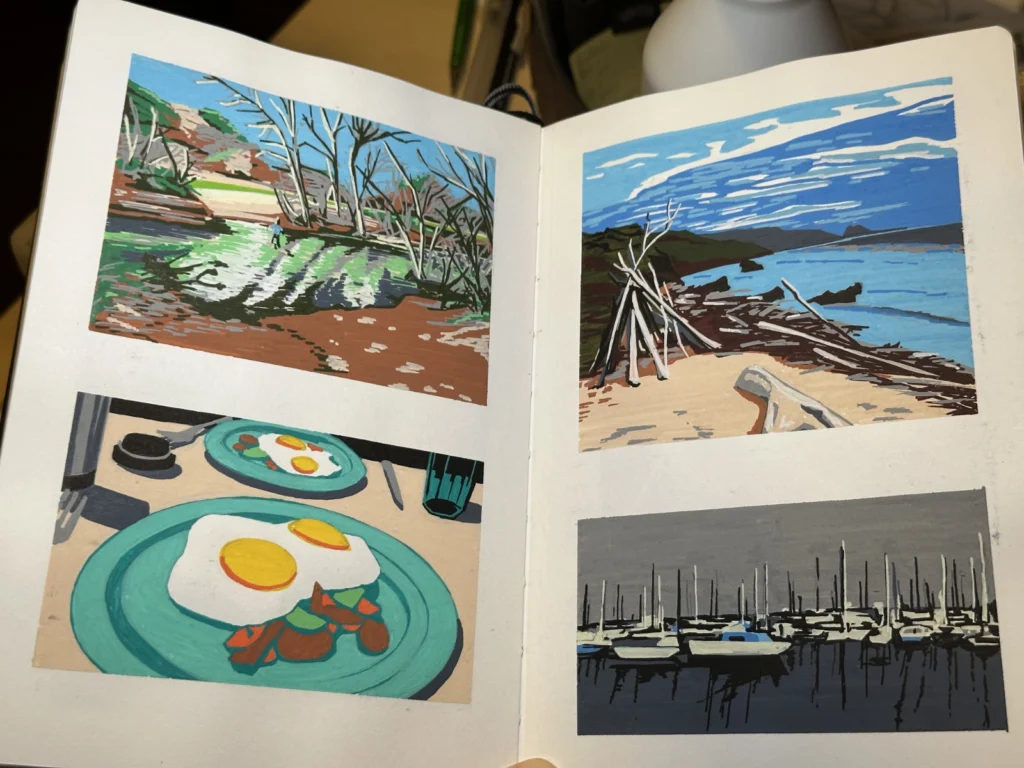
If you know me and my works, you know my “style” can shift a lot from project to project. This is intentional. For Beyond the Road, I wanted it to have a painted look reminiscent of the iconic National Parks posters, but with more vibrancy to carry the feeling of liveliness I felt at these vistas. I also wanted to carry over the sketchbook paintings I did during the actual trip to continue that journal into this graphic novel.
During the road trip, I would spend each night painting scenes of our journey using a Posca acrylic marker set I had packed with me. The bold opaque application and the restricted color palette forced me to get creative with how I rendered elements, such as sunsets and waves. The results were a series of sketchbook paintings that were both flat and vibrant at the same time.
On a practical side, this rendering style took far less time than the traditional ink-and-color method. Acrylic markers (especially the Posca brand) are opaque, which means you can layer without color blending. Therefore while you’re restricted in the palette available to you, there’s a lot of room for correction and repainting. I could tease the edges of different color flats, use color juxtaposition and textured mark-making until it felt organic and suggestive of the shapes and scenes I wanted.
When I transitioned this style to digital (because despite loving the physical media, I also love the edit-ability of digital), I used Clip Studio’s “Darker Bleed” brush (now deprecated, but still available to download from the Asset Library: ContentID #1842027) and a strict color palette in order to force the same creative application that I used with the Posca markers.
The saturation of colors changed based on mood with the highest points being these soaked pages of bold, high contrast colors, whereas the lower points were painted with desaturated low-contrast selections to create a duller scene. I even played with the panel borders’ colors, shifting their darkness and saturation based on energy, though I think I removed this effect for the final print in order to maintain the overall page dynamics.
I also used another Clip Studio brush called “textured pen brush” (also part of the deprecated brush pack: #1842027)) as a supplementary tool for when the details were too small for the default “Darker Bleed” brush, such as faces.
Back to Process…
Step 4: Edits & Reviews
All this pre-planning and step-by-step process does not completely prevent edits and redraws, but it does reduce the need for them.
After drawing all the pages, I went back to fix some details regarding pacing and flow of information, things I didn’t catch until after the rendering phase. Because everything was digital, it made it easier to cut, paste, and edit whole panels between pages, and the chosen rendering style made it easier to even create new pages between scenes.
I also got some useful feedback from “beta readers” (aka select friends and family) and a DC editor (I lucked out and got a portfolio review with one during a comic convention), so had to incorporate their notes.
The DC editor, in particular, had an eye for comic book lettering and recommended I take a look at Nate Piekos’ book, The Essential Guide to Comic Book Lettering, which I read. It lead me to Blambot, Piekos’ website of comic book lettering fonts (with many fonts free for indie comic creators). After learning more about comic book lettering design, I downloaded one of his fonts and went through the entire comic updating the bubbles and text for a much improved look and feel.
Step 5: Book Compositing (& Printing)
All the pages are drawn and we’re ready.
Clip Studio Paint – Ex has the nice “story” feature where you can access and edit your entire comic from 1 book file. However, depending on your final output, you may need additional tools like Affinity Publisher or Adobe InDesign.
CSP is like a “Jack of All Trades” in that it does a lot of really useful things, but not all of them perfectly. It is also designed first and foremost for the Japanese manga industry. If you want perfect text alignment, you’ll probably need to take the pages out into a design software like Affinity Designer or Adobe Illustrator. If you want to print it at home and fold your own zine, you’ll need to export all the pages (which Clip Studio enables via batch exporting) and re-import it into a book layout software, such as Affinity Publisher or Adobe InDesign.
Every printer has its own requirements about how pages need to be delivered and will provide specs or template files you’ll need to finalize your book and pages. With Mixam (a popular (at the time of this writing) small-batch printer of comics), they provided a spine width once I uploaded my pages and selected my paper weights. I then used that data to finalize the cover layout before submitting and reviewed the digital proofs before confirming the print order.
After that it’s a waiting game.
Addendum: How I Printed
I printed the graphic novel books with Mixam because I knew I could get the quality I wanted at an affordable rate and reasonable time (at the time… this fluctuates so do shop around if you’re looking to print a graphic novel), but there’s always a risk when ordering books. So my method was this:
- After submitting the files, checking the digital proofs, and triple checking all my parameters were in order, I first ordered a small batch of 5.
- Once I received them, I checked them over for color correctness, layout, any additional errors I might have missed. Mixam provides a color profile (a .ICC) that you can use in your design software to check your pages before submission. You should be working in CYMK if you intend to print. I didn’t (oops!) but the colors were within an acceptable range so it ended up fine.
- After I felt satisfied with the small batch, I went ahead and ordered the large batch and waited.
- Once I received the large batch, I went through every single copy to check for errors. I think this is important when working with any printer. There’s no guarantee against human or machine error, and if anything, it reassures me no one is going home with the book of upside down pages. Or the other one with a literal hole in the cover.
Don’t worry. Mixam refunded me the costs of those.
The rest of the process was logistics and details. Filing for an ISBN (completely optional if self-printing. Required if you plan to distribute to any retailer, though some distribution channels provide one for you), storage, packing, shipping, etc. I will go more into detail about that in another post focused on running and fulfilling a Kickstarter.
In the meantime, you can check out these other write-ups regarding Beyond the Road’s behind the scenes process! Thanks for reading!
Additional Blog Posts about Beyond the Road:
- A blog post on went well and what didn’t: Beyond the Road – A Post Mortem
- A list of resources used: Resources I used for Beyond the Road – a Quicklist